|
ASSEMBLING THE PORTFOLIO (OR WORK JOURNAL) FOR ASSESSMENT
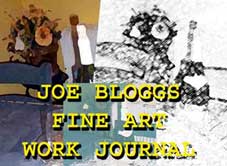
An example of a portfolio (or journal) cover
A cover design constructed from three versions of the same still life composition in oue case using Photoshop, whilst perhaps you could use photocopies to construct a cover. The cover is a very important part of the portfolio presentation. It sets the scene for what is contained within.
ABOUT THIS PAGE:
With assessments of 'AS' and 'A' Level work soon upon us we have decided to include a quick guide to: -
Assembling a Portfolio (or Work Journal) for assessment.
This advice is also aimed at Degree level students.
This article has been kindly supported by
ELWA - Education and Learning Wales.
A body dedicated to the post -16 education sector.


INTRODUCTION
Whether you're an 'AS', 'A' level or degree art student, the portfolio, or work journal, is a vital element of your assessment. It is the vehicle for transporting your ideas and skills to the assessor. In Fine Art, or Painting and Drawing, courses it counts for a considerable chunk of the marks and need to be at its best to secure the most on offer.
FIRST POINT TO REMEMBER:
No one likes to look through a heap of loose sheets with no logical thread or pattern of development.
Think of your portfolio (or work journal for AS and A level students) as a storybook.
This storybook needs, just like any other storybook, a beginning, middle, and an end.
By following this simple system you can produce a portfolio which not only looks good to the assessor, it also makes sense and shows you have actually bothered to think about the design of it - it will also make a big difference to your marks.
So how do you produce a portfolio with a beginning, middle and an end?
Quite simply you start with the brief.
This could be the brief set by the tutor for 'AS' students, or the self-imposed brief by 'A' level and Degree students.
The brief tells the assessor what you are studying - the practical direction of your artwork and the theoretical areas that will be obvious starting points.
For example:
Let's say you have been given a brief to study 'still life' by your AS tutor.
Where would you begin?
1.
By drawing 'still life' objects?
2.
By looking at 'still life' works by established artists?
or
3.
By experimenting with materials and media?
Click on one of the answers (above) you think is appropriate.
Check out each answer before proceeding - they each contain useful information
SO HOW DO YOU PRESENT THIS NEW KNOWLEDGE?
You could begin with a brief introduction stating why you chose the artist(s) you have studied - NOTICE here that I have included the plural (s) on artist. This means that you are more appreciated by your tutor when you consider the work of more than just one artist.
This introduction should include your thoughts about the artist and the work, perhaps why the objects were selected and why the work was relevant for the time in history. Don't forget to include you opinion of the work. This is one subject where your opinion really does matter - honest!
Don't go over the top on this, but about 10,000 words would be nice!
'Okay, okay - how about 500 - 1000 words then? Surely you can manage that?'
(Three or four of the paragraphs (combined) above will contain about 500 words - so it's not a lot is it?)
NEXT:
Some images of the work of the artist studied are essential. These can take the form of photographs, photocopies, or, even better, your version of their work.
IT IS NOW TIME TO SHOW YOUR SKILL:
DRAWING FROM SOURCE:
The next section could be used to show your skill at drawing.
Drawing from source is an essential element of the course
,
whether it's those old tins of beer, I mean milk bottles, or drawing the landscape or figure. It is a chance to experiment with the mark-making exercises of earlier classes and demonstrate that you can draw.
Remember to consider various techniques and styles and don't forget the annotation.
This stage of development will now begin to suggest to you the finished piece for assessment.
Perhaps you have enjoyed a particular medium or composition - or hopefully both. Now is the time to develop that favourite piece into a finished painting or drawing. Before you do though -
STOP!
And consider whether the image you have chosen from the volumes of preparatory work you have amassed so far can be improved.
If you are happy with it then make sure you say so. If you can improve it do so and make sure you say why.
ASSESSMENT DAY:
You've produced an absolutely cracking portfolio and you can relax and wait for that 'A' grade to fall through your letter box.
SERIOUSLY THOUGH - if you are logical about your presentation, and make it enjoyable to read and to look at, you will have enhanced your chances of a good grade.
However, if all the work within the portfolio is of a low standard no amount of skill in presentation will make a jot of difference.
|
|
Note:
For purpose of simplifying the text within this article we are using an example of 'still life' for a subject topic or brief.
Did you know?
First impressions count - make the cover of your portfolio (or journal) as eye catching as possible - but make it relevant to the material contained within.
Many students fail to achieve the marks their work deserves through the submission of a sloppy or scruffy, and poorly thought out portfolio. This guide has been written to help you put the portfolio together in the most effective manner to gain the maximum number of marks from the assessors.
Essential Tip:
Good Annotation is essential for good marks.
Annotation should include your knowlwdge of the subject, the artists studied, the materials and media and even your opinions. YES! Art is the exceptional subject whereby
YOUR VIEWS ACTUALLY MATTER
- That's a shock eh?
A QUICK NOTE ABOUT SKETCHBOOKS:
The portfolio, or work journal, will be your chance to present your work in the most favourable light - but don't forget about sketchbooks. They are an ideal way to record your thoughts, visual responses to the world around you, and to work out ideas from your imagination.
Sketchbooks are visual diaries.
Keep one with you
(and a pencil of course)
and you'll be surprised at how quickly you'll need a new one. During my degree
(here I go now sounding like Uncle Albert from 'Only Fools and Horses')
I completed two or three sketchbooks per semester. This meant that I had more than enough support material for assessment - and provides me with a constant source of material that I still use today.
"Think like a professional artist and your work will begin to look like that of a professional artist.
"
Nigel Williams 2002
NOTE:
You are also required to show knowledge of specialist terms.
So, start using them in your annotation.
Make sure that the assessor doesn't miss them when digesting your work -
highlight
them if necessary.
ANNOTATION is again an essential element.
NOTES, followed by NOTES, and even more NOTES.
PRESENTING THE WORK - binding your masterpiece:
How will you present all your hard work? Will you use a ring binding system, or a spiral bound version?
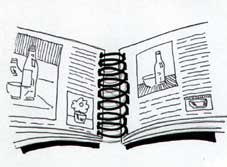
A spiral bound version of a portfolio or journal
Perhaps, if you're stuck for ideas, you could pop down to the local Newsagents (look for the shops selling Wedding Stationary) and ask them if they have an old stationary binder you could use. These makes great binders, they have a large capacity and are often padded for that look of class. The binders normally have paper inserts on the cover, which can be easily removed and replaced with your own design.
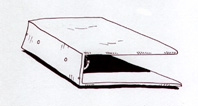
A Wedding Stationary binder could be used for presenting your work.
Whatever you decide, the portfolio, or journal should be large enough to take most of your work. A1 size is normally sufficient, but it's up to you, you should use whatever you feel is right for you.
CLICK HERE FOR SUGGESTIONS OF LAYOUT BALANCE
Drawing from source:
cont...
(See left)
From these initial drawings you can begin to add colour to the compositions. Here you can experiment with different media - watercolour, oils, acrylics, pastels, coloured pencils, or just about anything - collage, textiles, but don't forget the annotation.
REMEMBER:
Art requires ability in some form or medium. Skill in drawing is still highly rated (contrary to the trend in contemporary art) and an ability to paint, and to think clearly, will be of great benefit.
BEST OF LUCK
and don't forget that these guidelines are just that - guidelines.
You will benefit from your own presentation and initiative to take these tips and turn them into a personal piece. After all - isn't that what art is all about?
|
